This post is part of C# Advent 2024, for more event content click here.
If you have kids, you know how difficult it is to keep schedules straight… With school, work, sports and other appointments it is easy for one or two to fall through the cracks once in a while. My wife and I had talked about it a couple times and she mentioned how she’d like to take a picture of the flyers we get from our kids’ schools and have an application automatically create a calendar event for it.
So, that got me thinking… What if there was a technology that would allow me to extract information from a document? Well, unless you’ve been under a rock the last couple years you know that there are quite a few AI models out there that allow you to do that and more.
In this article, I will show you how easy it is to implement a solution to the problem mentioned above with a combination of Azure OpenAI, Blazor and C#. The idea is to allow the user to take a picture of a flyer or other documents that contain dates and use Azure OpenAI to extract the pertinent information to create a calendar event, the application needs to be able to log in to Google calendar since that is what we use to manage our family’s schedules.
I started by looking for any Blazor samples that were authenticating with Google, luckily, I found this Github repository so I used that as the starting point of this application. You will obviously need to generate the credentials that will be used to authenticate, you can follow this guide in order to do that.
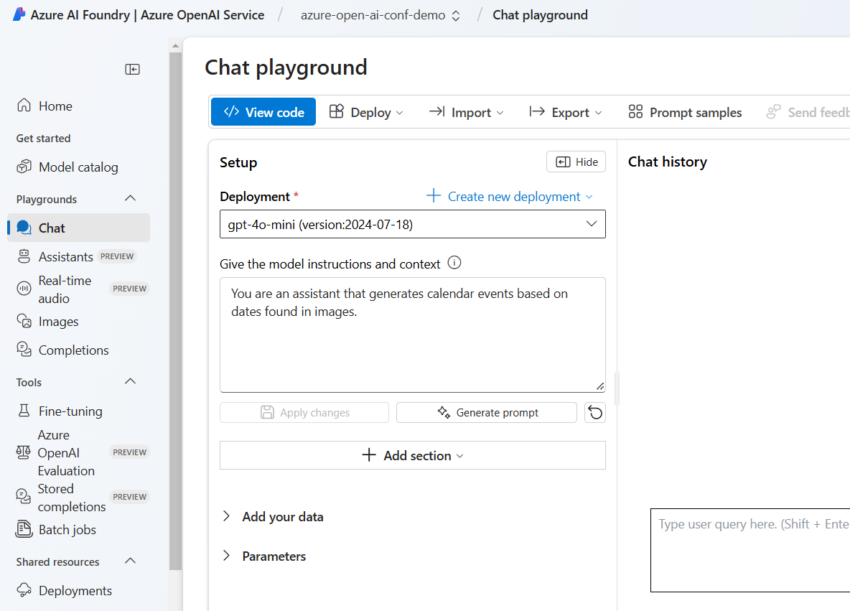
The next step was to choose the AI model that would extract the information from the pictures the user provides, for this task I used the Azure Open AI service in Azure AI Foundry to run some tests with the gpt-4o-mini model.
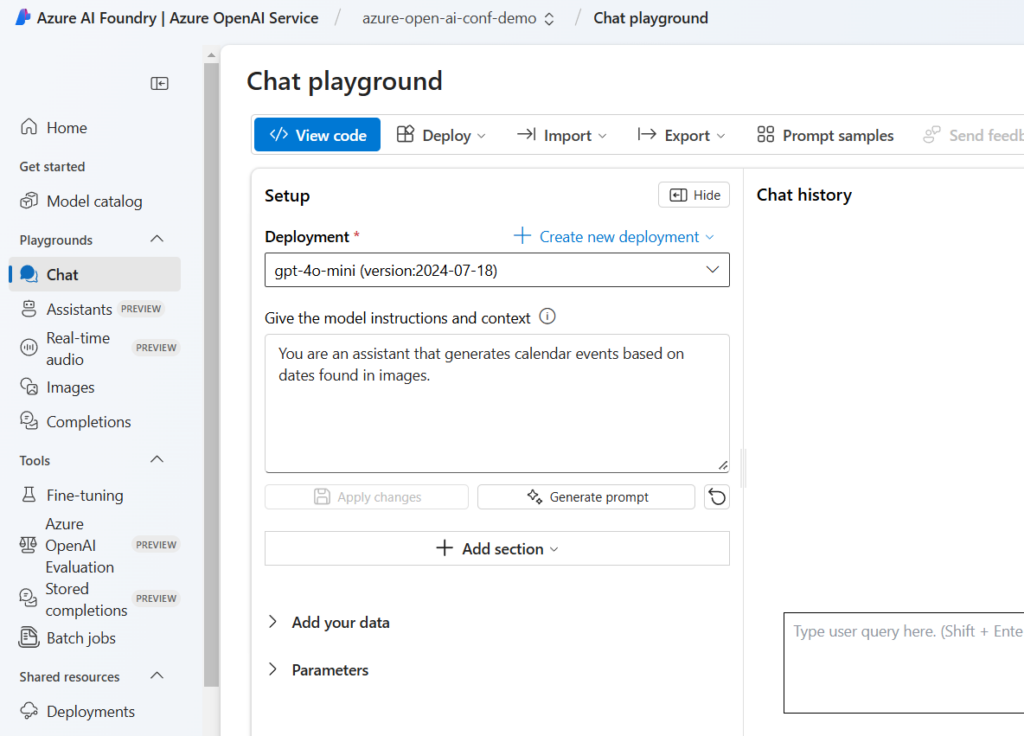
If you have interacted with any of these models you know how important the system prompt is (hence why “prompt engineering” is a thing now). In my case, I tried a couple different prompts; some of which gave me way more information that I needed and some that provided the information in a format that I didn’t find useful. I finally settled on the prompt show in the image above.
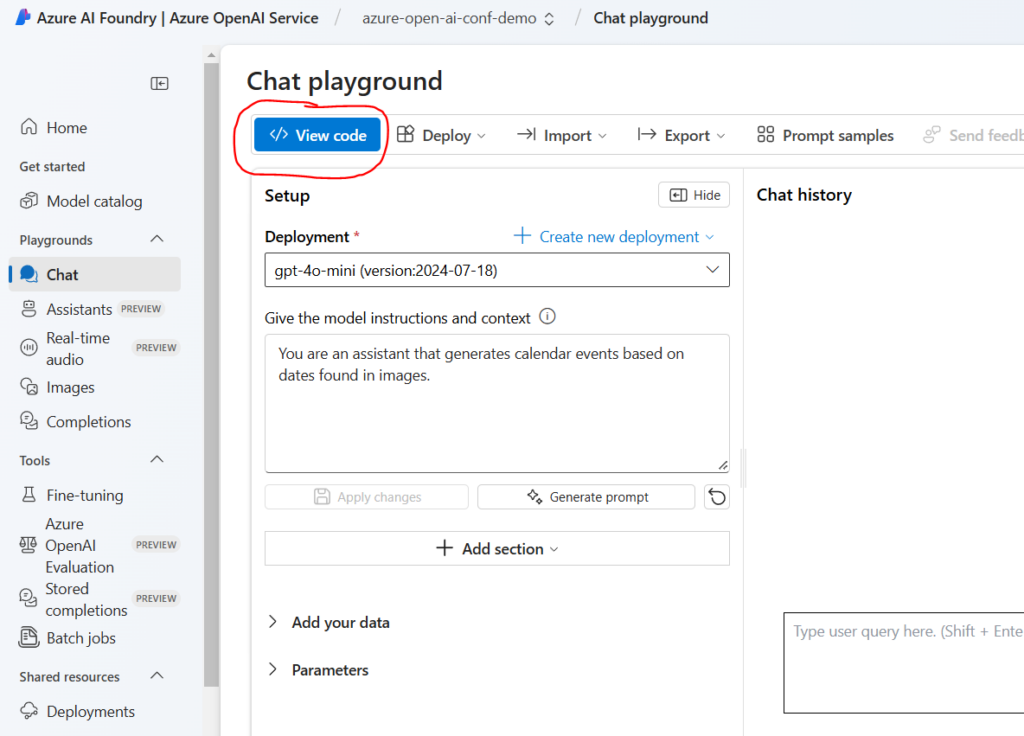
With a model and a prompt selected the next step was to be able to call this model from our Blazor application, luckily, Microsoft has made it really easy to be able to do this by providing sample code that you can copy and paste directly in your application by clicking on the “View code” button shown below:
After clicking on that button, the following window opens, as you can see there are a few different language options as well as 2 different authentication options:
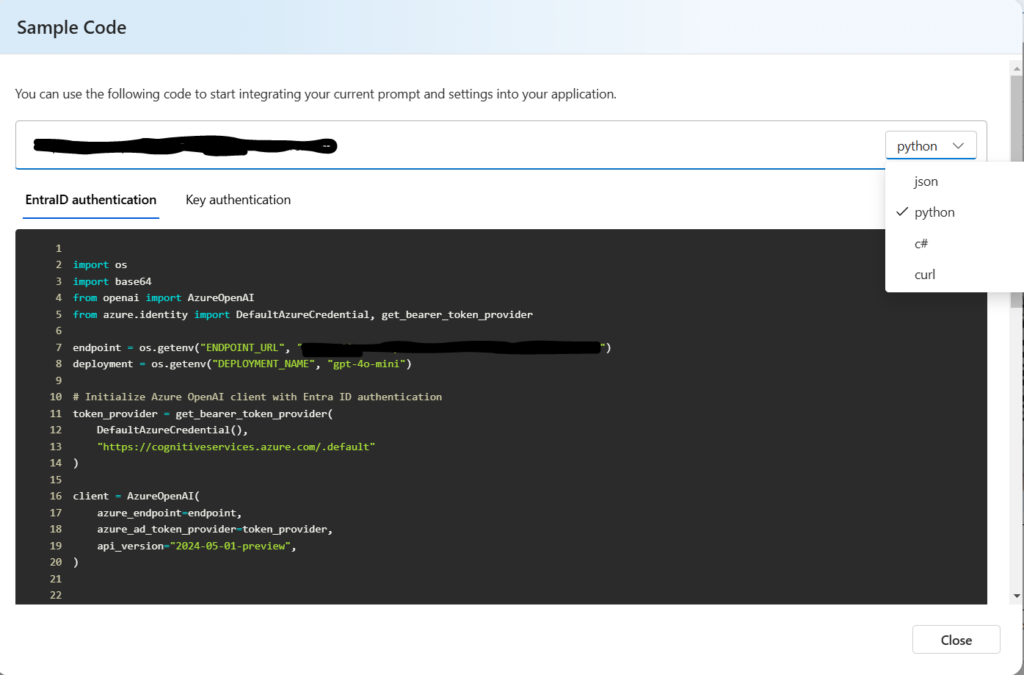
For this application, we are going to use the “Key authentication” option, we will copy the code shown in the screen and we will add it to the Index.razor page:
@code{
    private string? calendarEvent;

    private async Task LoadFile(InputFileChangeEventArgs e)
    {
        var imageFile = e.File;

        try
        {
            byte[] bytes;
            using (var memoryStream = new MemoryStream())
            {
                await e.File.OpenReadStream(maxAllowedSize: 2000000).CopyToAsync(memoryStream);
                bytes = memoryStream.ToArray();
            }
            var encodedImage = Convert.ToBase64String(bytes);
            using (var httpClient = new HttpClient())
            {
                httpClient.DefaultRequestHeaders.Add("api-key", "{YOUR API KEY}");
                var payload = new
                {
                    messages = new object[]
                    {
                  new {
                      role = "system",
                      content = new object[] {
                          new {
                              type = "text",
                              text = "You are an assistant that generates calendar events based on dates found in images."
                          }
                      }
                  },
                  new {
                      role = "user",
                      content = new object[] {
                          new {
                              type = "image_url",
                              image_url = new {
                                  url = $"data:image/jpeg;base64,{encodedImage}"
                              }
                          },
                          new {
                              type = "text",
                              text = ""
                          }
                      }
                  }
                    },
                    temperature = 0.7,
                    top_p = 0.95,
                    max_tokens = 800,
                    stream = false
                };

                var response = await httpClient.PostAsync("{YOUR ENDPOINT}", new StringContent(JsonSerializer.Serialize(payload), Encoding.UTF8, "application/json"));

                if (response.IsSuccessStatusCode)
                {
                    var responseData = JsonSerializer.Deserialize<GptReponse>(await response.Content.ReadAsStringAsync(), new JsonSerializerOptions{
                        PropertyNameCaseInsensitive = true
                    });
                    Console.WriteLine(responseData);
                    calendarEvent = responseData?.Choices[0].Message.Content;
                }
                else
                {
                    Console.WriteLine($"Error: {response.StatusCode}, {response.ReasonPhrase}");
                }
            }
        }
        catch (Exception ex)
        {
            var test = ex.Message;
        }

    }
I had to make a couple small changes (the original code was using “dynamic” and JsonConvert to parse the response) but for the most part it is pretty much the same code provided by the Azure OpenAI site, next, I need to add a couple InputFile controls to allow the user to take a picture or select an image from their device library:
Select an image:
<br />
@* <input type="file" accept="image/*" OnChange="@LoadFile"> *@
<InputFile OnChange="@LoadFile" accept="image/*" />

<br />
OR Take a picture
<br />
@* <input type="file" accept="image/*" capture="environment" OnChange="@LoadFile(e)"> *@
<InputFile OnChange="@LoadFile" accept="image/*" capture="environment" />

<textarea id="translatedText" @bind="calendarEvent" class="form-control"></textarea>
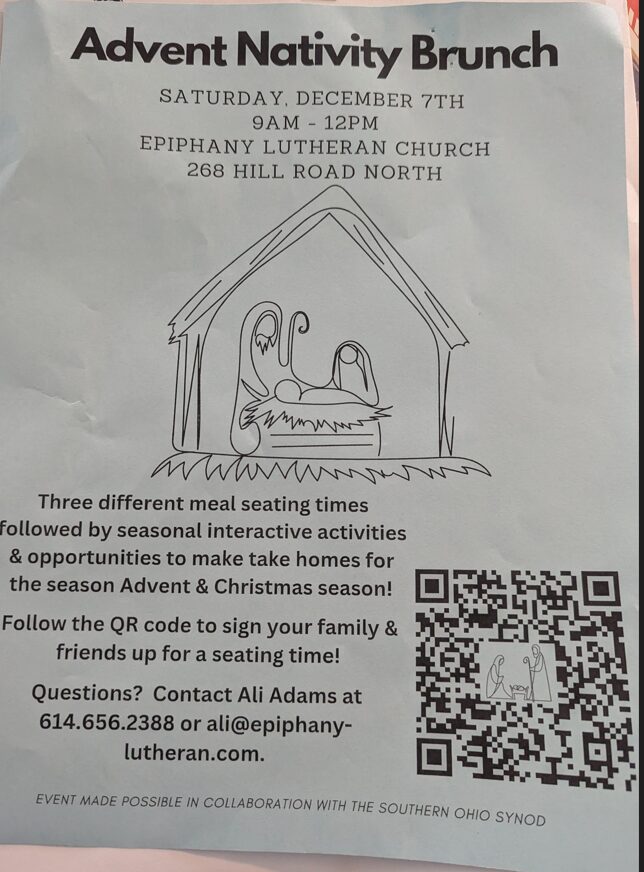
We will now run the application and provide the following image as input:
This is the result:
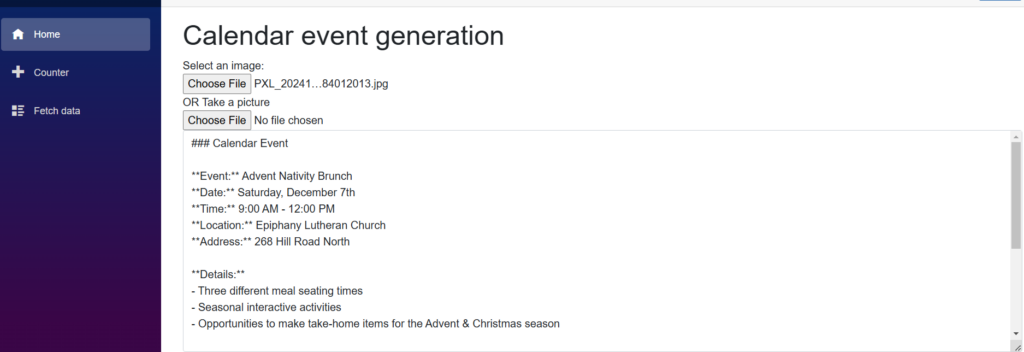
Not bad for the first version of the application! Now that we have the event data the next step is to create the event in Google calendar so stay tuned for part 2!

